.png)
Schoology Support for Admin
This guide is designed for administrators and provides step-by-step instructions on how to install and access Education Modified (EdMod), along with answers to common questions that may arise during the initial setup process.
Install and access Education Modified within Schoology
- In the Schoology App Center, select the Special Education category.
- Click Education Modified to begin the installation process.
- Agree to the terms and conditions presented.
- You will then be given an option of installing for the Organization or as an Individual Teacher.
Note: For most use-cases, we highly recommend an Organization-Wide Installation. However, if you wish to only install for yourself to test out Education Modified, individual installation instructions are also included below.
Organization-Wide Installation
- After clicking Add for Organization, a dialog box of setting options should appear.
- The first set of options involves Users. These options dictate which users (if any) will have access to Education Modified in the 4-box App menu in the main Schoology Navigation.
- We recommend choosing the All Users box and then selecting Teacher and System Admin roles.
- If your School is using Education Modified with additional user groups (paraprofessionals, advisors, guidance counselors, etc), their roles should be checked here as well.
Important: Ensure that any student and parent roles are unchecked before saving. Students and Parents should not be given access to Education Modified.

- The following settings dictate if Education Modified should be accessible via the side menus of Courses and Groups. To enable both or either, select the All Courses and/or All Groups options.
Important: If selecting these options, be sure that the Course admins only and/or Group admins only boxes are checked. Otherwise, students will see Education Modified appear in the side menus of their courses.
Note: These options only control where the Education Modified App can be accessed within Schoology. It does not influence what rostering data is available.

- Once you have updated the settings to your liking, click Install. (If you are unsure, we'd recommend starting with limited locations; you can always add additional roles later.)
Individual Teacher Installation
- Select Add to my homepage and the Courses and Groups in which you would like to install Education Modified.
- Click Install
Accessing Education Modified
- Once installed, click the four-square icon to open Education Modified

- You can also access Education Modified from the left toolbar in both your Courses and Groups.

- After clicking on Education Modified in either location, you will be given the option to Approve. Please select this option to finalize the installation. Important: If this step is not completed, Education Modified cannot begin the process of uploading your data.
To learn more about Accessing Education Modified in Schoology, check out THIS article.
How to Create a Course or Group for Education Modified in Schoology
Introduction
Education Modified relies heavily on Schoology's Courses and Groups to pull student roster information and manage staff access to student profiles. You can find more details about that process here.
Because of this, some schools need to create Courses within Schoology specifically to give certain staff members access to students within Education Modified. This might be a course containing all IEP students to give administrators access to all student profiles, or many courses with represent individual paraprofessional case-loads.
Many schools we work with want to know how to create these custom courses in such a way that they are not visible to students, since they are not directly related to a child's instruction. By following the instructions in this article, you will be able to create courses and groups that pull into Education Modified, but do not otherwise impact Schoology workflows or student visibility.
Step 1: Create a Custom Grading Period
Note 1: This step only needs to be completed once per school year. If it has already been completed for your school, you can skip ahead to Step 2.
Note 2: For this step, Schoology Admin rights are required. If you do not have these rights, please ask a staff member at your school who does have these permissions to complete the following steps.
- In Schoology, go to the top menu and click Tools -> School Management
- Select 'Grade Settings' from the sidebar.
Click the Button labeled: '+ Add Grading Period' which should appear on the center-right-hand side of the screen.


In the dialog that opens, title your new grading period 'Future Sandbox' or anything else you would like and select two dates that are far in the future. (We would recommend 1-2 school years ahead of time.)

- Click 'Add Period' to Save.
- Now, back in main Schoology menu above, select Tools -> User Management
- Select 'Permissions' from the Side Menu.
Scroll down to the 'Courses' Section of Permissions and ensure that 'View upcoming courses' is unchecked for Student users.

- Then scroll down to the bottom of the page and click 'Save Permissions' to save.
Step 2: Create Your Course
Note: For this step, you must have permission to create courses within Schoology. If you do not have these rights, please ask a staff member at your school who does have these permissions to complete the following steps.
- From the main Schoology menu, click Courses -> My Courses.
Click the 'Create Course' button in the center-right-hand side of the screen.

- In the dialog that opens, fill out the following:
- Name the Course something that makes sense for the context. "EdMod - All Students", "McConolley Case Load" etc.
- Select a Subject Area of "Other". (This is not important from Education Modified's perspective, so feel free to change.)
- Select Level of "None" (This is not important from Education Modified's perspective, so feel free to change.)
- Select the Grading Period that was created in Step 1. (Note, it may be grayed out because it is in the future, you should still be able to click it.)
If you do not see any of the options above, try clicking the 'Advanced' checkbox in the bottom-left-hand corner of the dialog.

- Click 'Create' to create the course.
Step 3: Add Staff Members
- If you are following on from Step 2, you should now be on the course page. If not, navigate to the course by selecting 'Courses' from the main Schoology menu and choosing the course card from the list.
- Click the 'Members' link in the side menu.
- Click the 'Add Members' button.
Select all Staff Members you wish to add to the course. (These staff members will be given access to all students you add in the following step.)

- Click 'Add Members'
Important: For each staff member you just added, click the cog icon in their row, and select 'Make Admin' from the drop-down menu that appears. (If they are not Admins of the course they will not be given access to students who are members in Education Modified.)

- Now it is time to add students.
Step 4: Add Students
- If you are following on from Step 2, you should now be on the course page. If not, navigate to the course by selecting 'Courses' from the main Schoology menu and choosing the course card from the list.
- Click the 'Members' link in the side menu.
- Click the 'Add Members' button.
Select all Students you wish to add to the course.
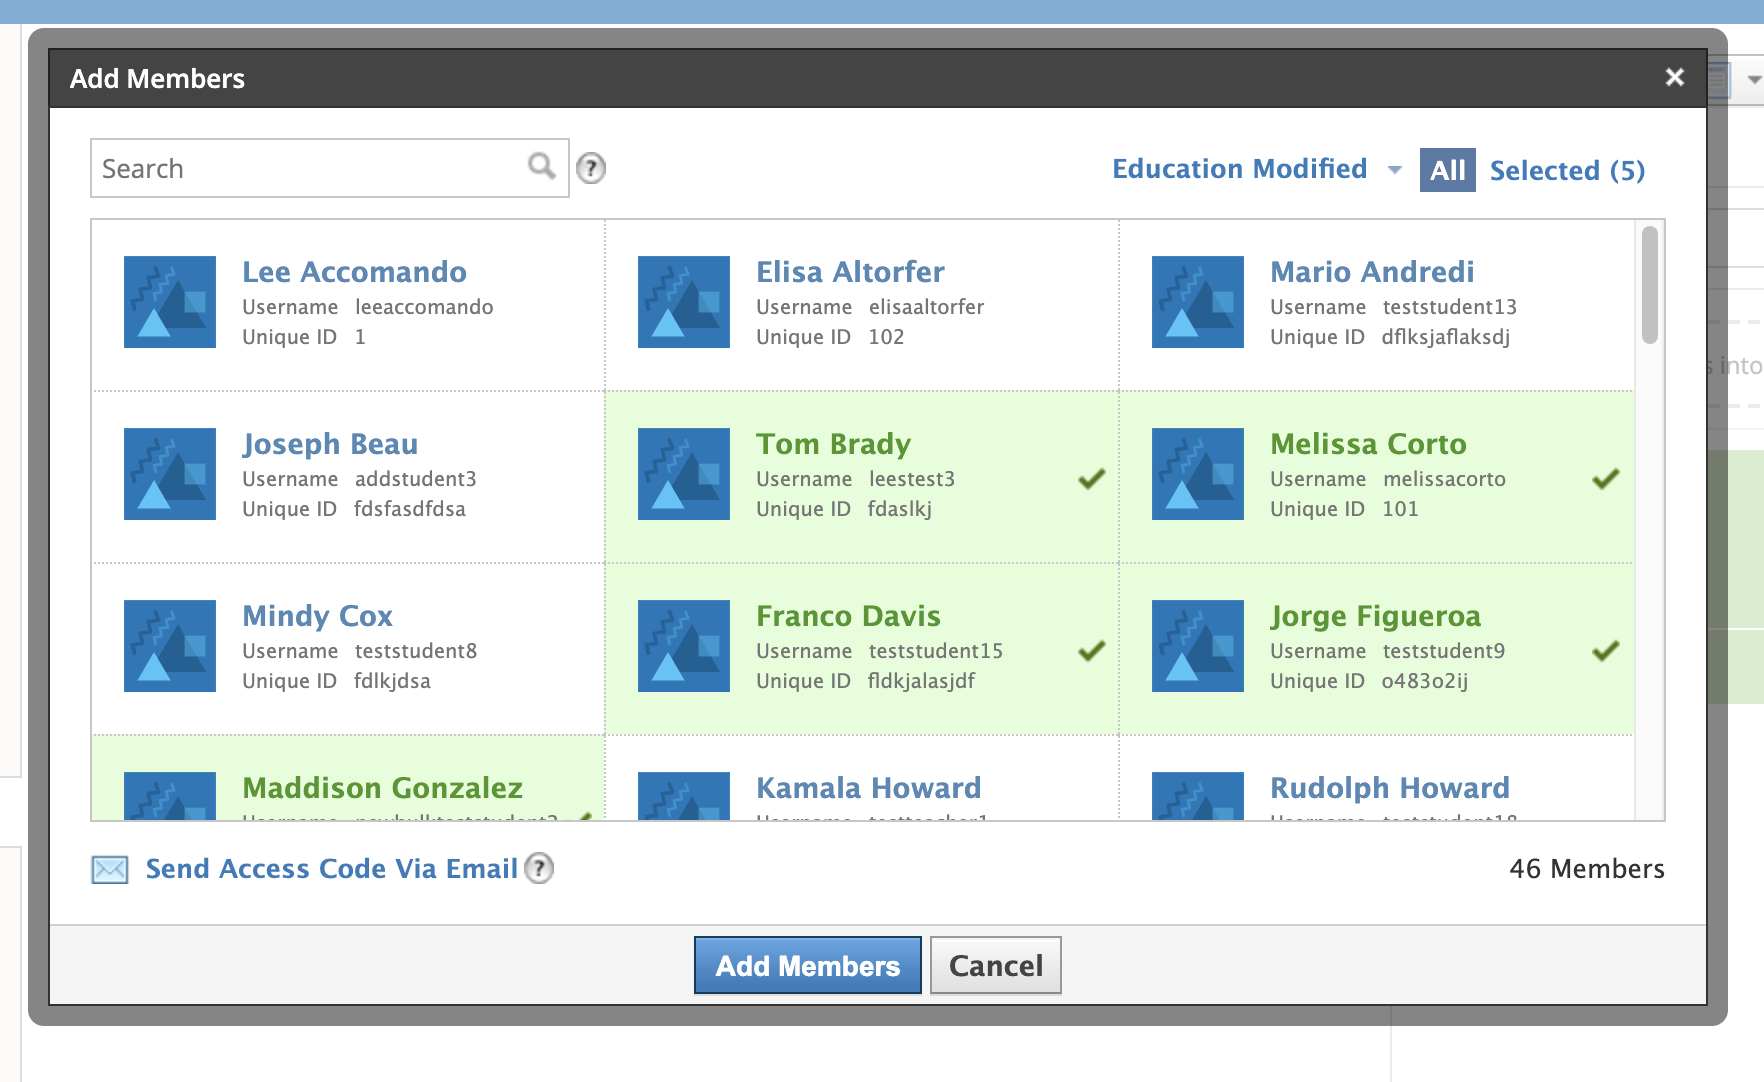
- Click 'Add Members'
Select all Students you wish to add to the course.
Additional FAQ's
Some teachers are having trouble accessing Education Modified. What can I do?
- The most common reason for access issues is related to third-party cookie settings. For Education Modified to work in Schoology, a user’s browser must enable these types of cookies to be set. A full guide for how to configure these settings in all major browsers can be found here. We recommend sharing this guide with all staff members you expect to make use of Education Modified in Schoology.
How are student rosters making their way to Education Modified?
- You can read all about Education Modified rostering in Schoology here.
Staff are reporting that their rosters are out of date in Education Modified. What can I do?
- By default, staff must re-authorize Education Modified and update their rosters once every 7 days. However, if changes are made in Schoology, they can always manually trigger a roster update by following these instructions.
How can I see all students in Education Modified?
- As is covered in our guide to Schoology / Education Modified rostering, due to privacy concerns on Schoology’s side, even as an administrator, Education Modified only has access to students that are in courses or groups that you are listed as an admin for within Schoology.
The best workaround for this is to create a course within Schoology that contains all students you would like to see in Education Modified. Instructions on best practices to create such courses can be found here.
- Update your Education Modified roster, and your new group should appear, granting access to all students you added.
Why are teacher or parent names appearing in Education Modified?
- This is a side effect of how our rostering process works and what information is provided to us by Schoology. The short version is that if you have courses or groups in Schoology that contain teachers or parents as non-admin members, they may appear in Education Modified as students. To avoid this, you can send us a list of courses and groups in this category (with the course or group title exactly matching the way it appears in Schoology), and we can add them to our exclusion list. This will prevent those specific courses and groups from syncing with Education Modified in the normal manner.